Asset Mesh Replacement
If you have sufficient experience with Inochi Creator, you can further expand Asset Replacement feature with Mesh Data Replacement. This means more precise rigging for your custom assets.
Importable .INX Files
Custom mesh data are imported from existing .inx files. Only .inx files with certain characteristics can be imported:
- Created using Mannequin's Export feature with 400% scale.
- No modification in regards to node names and parameter names.
- No rearranged node structure.
If you're exporting .inx files for editing/importing back to Mannequin afterwards, there's a high chance you want it to be as fast as possible (since you'll be doing it multiple times as part of editing process), disregarding quality and/or optimization. For fastest export speed, you can:
- Disable
Optimize File Sizein Export sidebar. - Disable
Outlinein Art Style sidebar.
Importing Mesh Data
To import mesh data from an .inx file, first enable the Enable Mesh Replacement toggle in either one of the asset replacement rule. Afterwards, click the folder open icon that appears, and choose your intended .inx file.
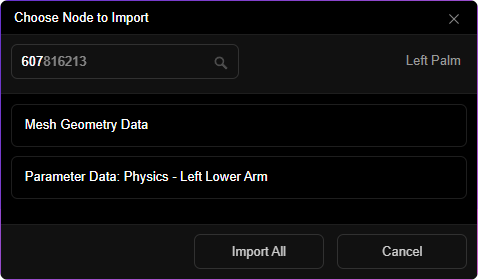
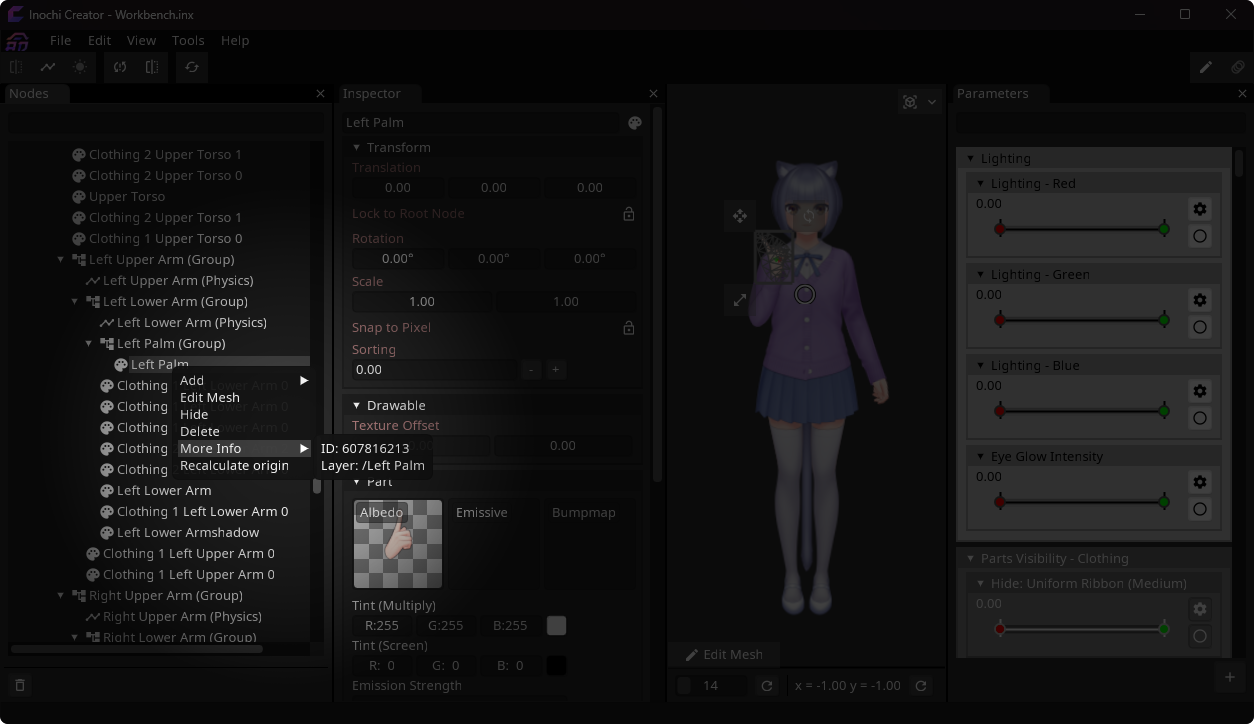
In the dialog window that shows up, enter the UUID of the node that you want to import. You can obtain this UUID in Inochi Creator by right clicking the specific node's entry in the Nodes panel, then More Info -> ID.
Most of the time, you don't need to enter the complete UUID! Type the first few digits and the autocomplete function will search for the closest match. As long as the UUID suggested by the autocomplete is correct, you can skip typing out the rest. When the correct UUID is found, click the Import All/Import Selected button to finish the process.
TL;DR for Beginners
- Export your character with 400% scale. For faster exports, disable
Optimize File Size(in Export sidebar) andOutline(in Art Style sidebar). - Open your .inx file in Inochi Creator. Find your custom asset in the
Nodespanel. - Edit the corresponding node's mesh (by clicking
Edit Mesh) and mesh deformation for the corresponding node in parameters. Do not change the corresponding node's name and do not change any parameter names. - Save your .inx file.
- Find your corresponding node's UUID by right clicking its entry in the
Nodespanel ->More Info->ID. - Back to Mannequin, find your corresponding custom asset in the
Asset Replacementsidebar, then enable theEnable Mesh Replacementtoggle. - Click the folder icon and browse for your .inx file.
- In the window that shows up, enter your corresponding node's UUID (which you got from step 5).
- Click
Import All/Import Selected. - Export your character to .inx again. Your custom asset should have your customized mesh data afterwards.